Follow Me On Social Media!
Reverse Sear Prime Rib: The Juicy Upgrade You Need
Introduction to Reverse Sear Prime Rib
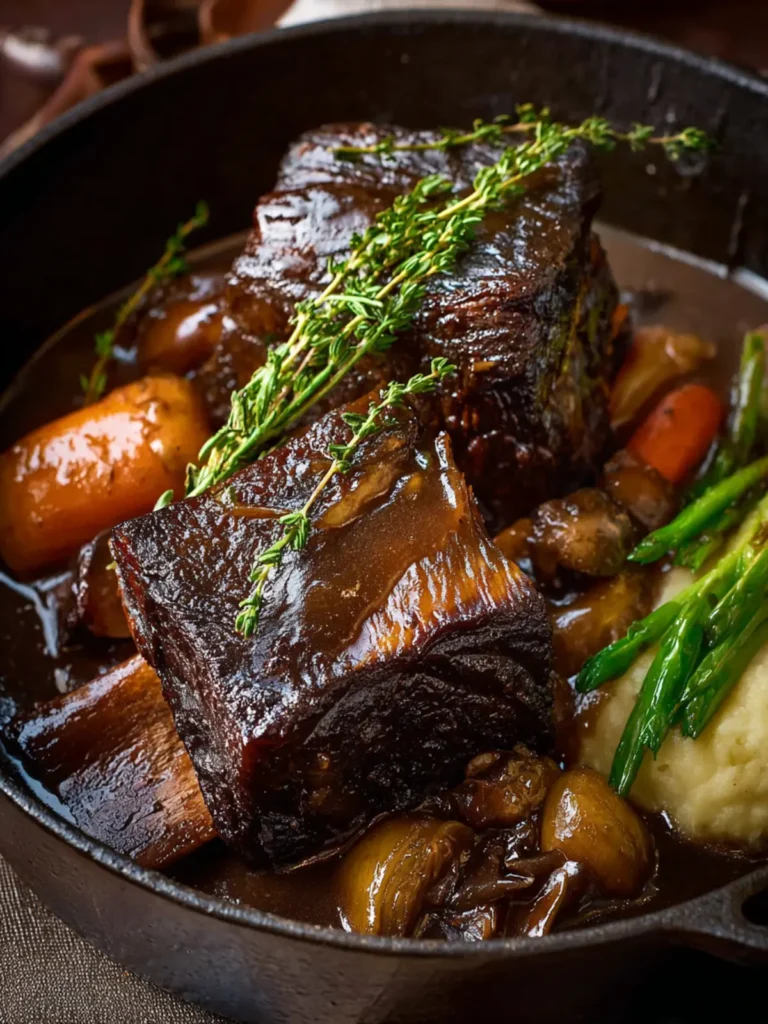
Imagine a dinner that draws friends and family closer, the enticing aroma of a perfectly cooked reverse sear prime rib wafting through your home. With its beautiful crust and juicy, tender interior, this elegant dish is a centerpiece that never fails to impress. The reverse sear technique elevates the traditional roast, making it not only visually stunning but also perfectly cooked from edge to edge. But what makes this cooking method so special?
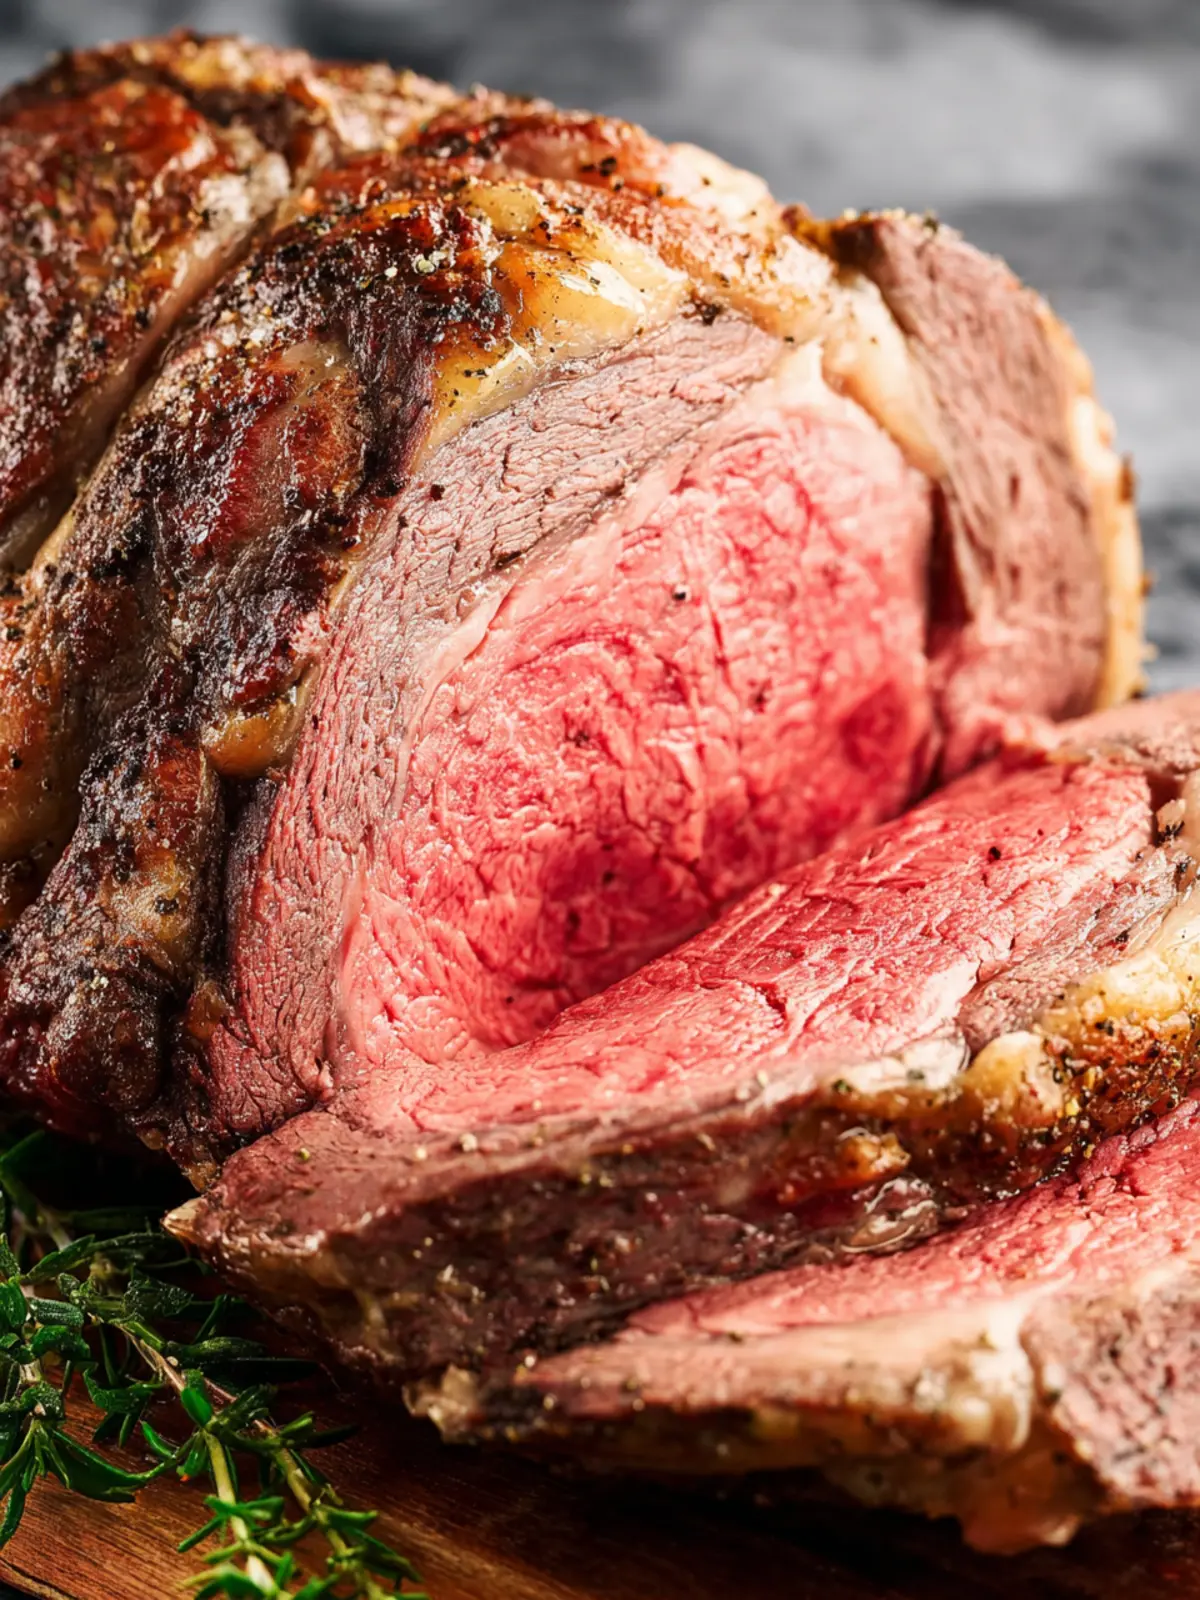
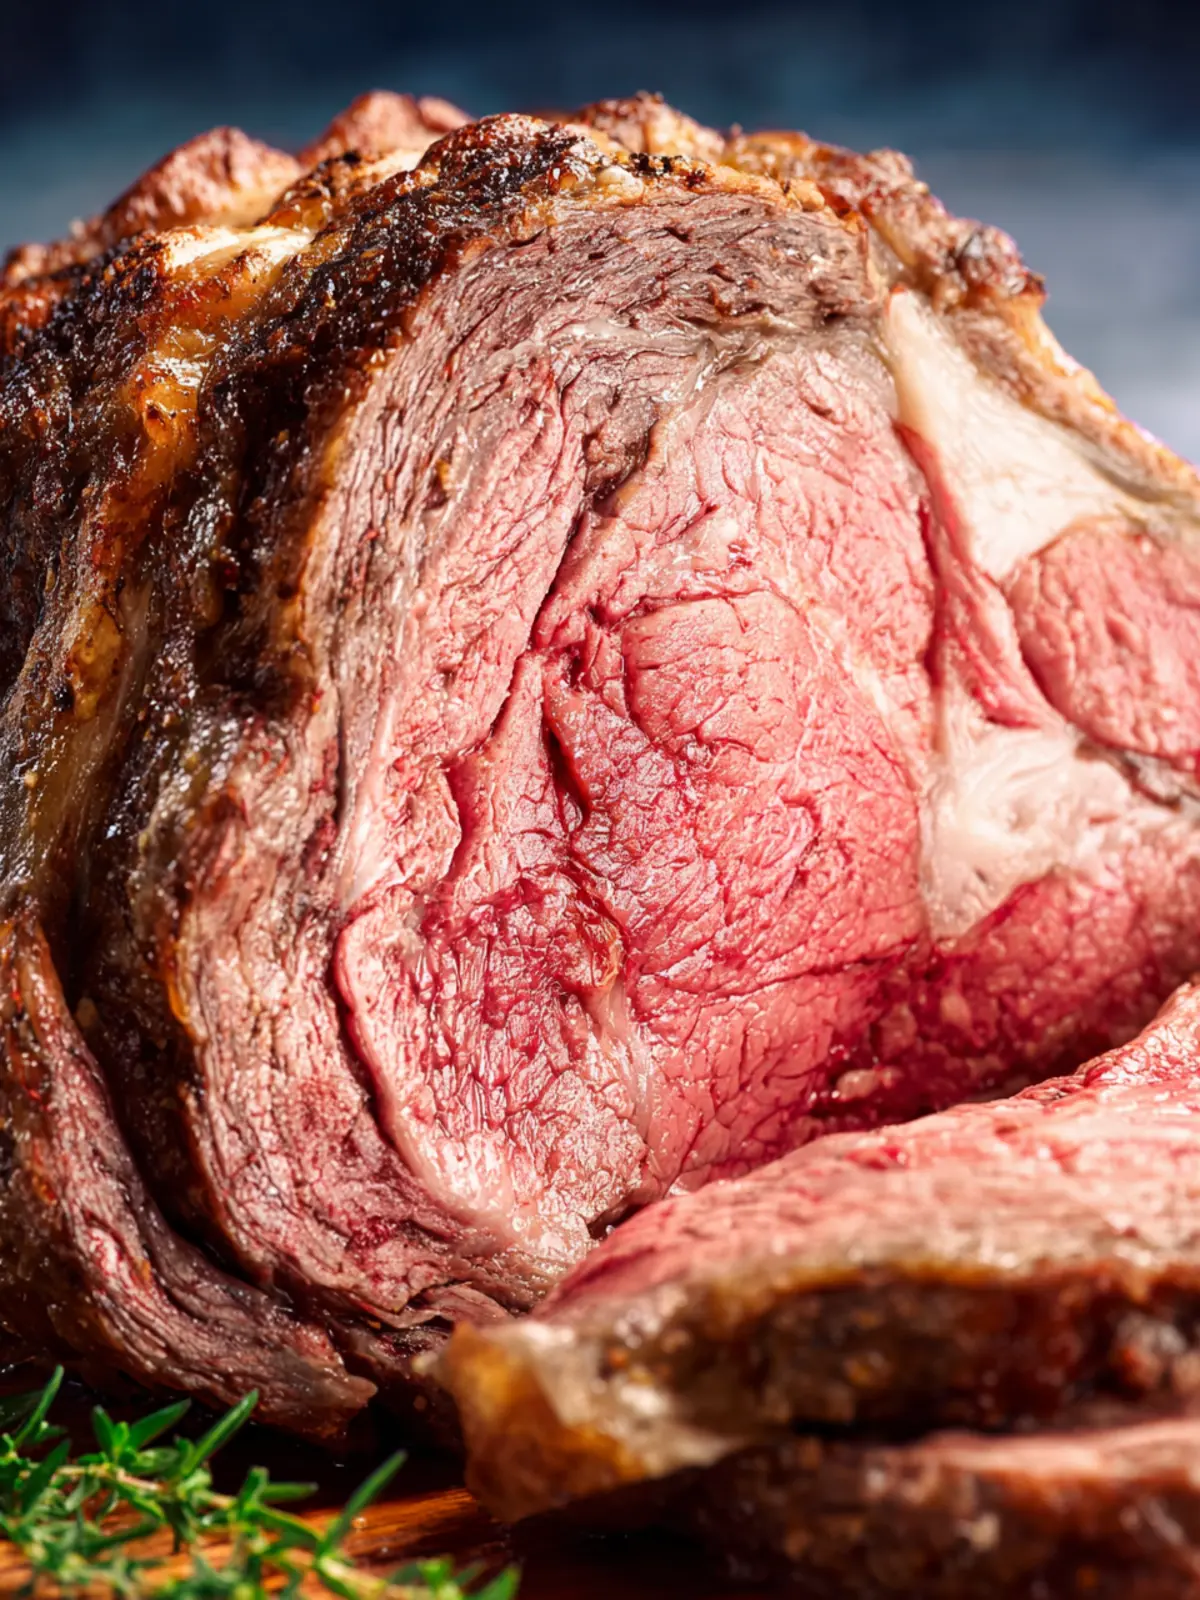
Using the reverse sear method means cooking the prime rib low and slow before finishing it off with a high-temperature sear. This approach allows for precise control over the internal temperature. You end up with an evenly cooked roast, where every bite is as delicious as the last. Plus, the lovely caramelized crust created during the searing process adds a depth of flavor that’s hard to resist.
What makes reverse sear prime rib irresistible?
The beauty of reverse sear prime rib lies in both its flavor and texture. Here’s why this method will win over your taste buds:
-
Juicy Flavor: By cooking it at a low temperature first, the meat retains its natural juices, leading to an incredibly moist roast. Who doesn’t crave a dish that melts in your mouth?
-
Even Cooking: Forget about the dreaded overcooked edges and undercooked centers. With a reverse sear, you’ll achieve a perfect medium-rare throughout. This even cooking creates a consistent texture and delicious experience with each slice.
-
Stunning Presentation: Once seared, the roast showcases an irresistible golden-brown crust. It’s the kind of dish that makes guests want to take out their cameras before they dive in.
-
Simple to Master: While it may sound sophisticated, the reverse sear technique is surprisingly straightforward. Just a little patience and attention to temperature will set you on the path to culinary success.
Your culinary journey to mastering the perfect reverse sear prime rib doesn’t have to be intimidating. With the right preparation and a bit of love, you’ll create a dish that’s not only memorable but also one that will make you the star of any gathering. So, let’s get started!
Key Ingredients for Reverse Sear Prime Rib
When crafting the ultimate reverse sear prime rib, it’s essential to select the finest ingredients that will elevate the meal to a feast-worthy status. Each component contributes to that melt-in-your-mouth experience we all crave.
-
Prime Rib: Starting with the star of the show, a high-quality prime rib ensures superior flavor and tenderness. Look for marbling in the meat – it’s the fat that renders during cooking, creating a juicy and decadent result.
-
Kosher Salt: This is more than just seasoning; it’s the key to enhancing the natural flavors of the beef. Salt draws moisture to the surface, helping to form that coveted crust during the searing process.
-
Freshly Ground Black Pepper: Adding a robust kick, freshly ground black pepper balances the richness of the rib. Its aromatic qualities pair beautifully with the savory meat.
-
Garlic: Whole cloves or garlic powder can add depth to your seasoning. Roasting garlic mellows its sharpness, infusing a buttery essence into the prime rib.
-
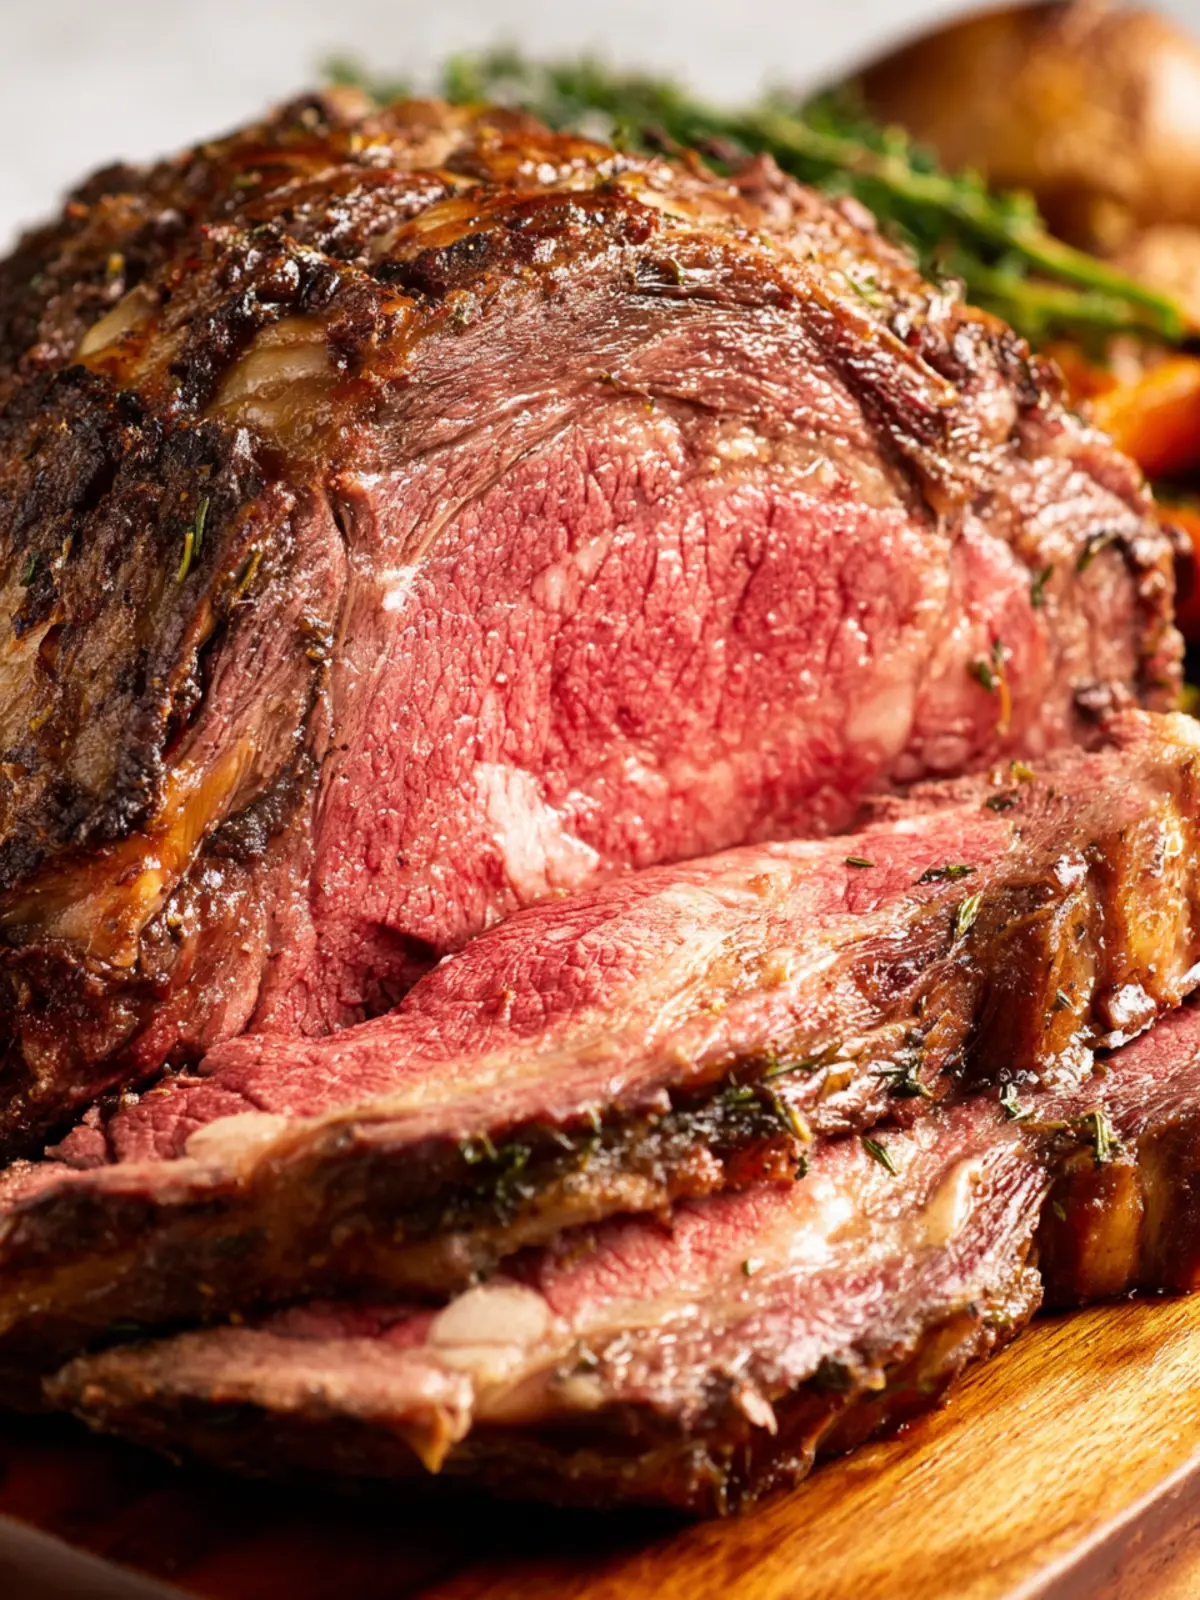
Herbs: Fresh thyme and rosemary offer a fragrant touch. These herbs complement the beef and enhance its flavor profile, making every bite irresistible.
By carefully choosing these ingredients for your reverse sear prime rib, you’re setting the stage for a meal that will leave your guests raving and your taste buds dancing.
Why You’ll Love This Recipe
The reverse sear prime rib method takes your traditional roast to a whole new level of flavor and tenderness. Imagine walking into your kitchen on a special occasion, the aroma of perfectly cooked prime rib wafting through the air, making your mouth water in anticipation. This recipe ensures that the beef is not only juicy, but also has a deliciously crusty exterior that you simply can’t resist.
The Perfect Cooking Method
What truly sets this recipe apart is the reverse sear technique. Instead of searing the meat first, you gently cook it at a low temperature before finishing with a high-temperature sear. This means:
- Better Temperature Control: You’ll achieve that perfect medium-rare center without the risk of overcooking.
- Enhanced Flavor: The extended low-and-slow cooking allows the beef to absorb all the seasoning, creating a rich and savory taste.
A Showstopper for Any Occasion
Whether you’re hosting a holiday dinner or a casual weekend gathering, this reverse sear prime rib is bound to be the star of your table. Your guests will be impressed by your culinary skills when they see that beautifully browned roast, and the compliments on your cooking will keep flowing. Plus, the leftovers—if there are any—offer plenty of delightful choices for sandwiches and salads!
This recipe isn’t just about the flavors—it’s also about the experience of creating something extraordinary. You’ll love every moment of cooking this prime rib, and even more, enjoy sharing it with those who matter most.
Variations on Reverse Sear Prime Rib
Exploring the world of reverse sear prime rib opens up a delightful landscape of flavors and techniques. One bite of a perfectly cooked prime rib can take you on a journey, but why not personalize it further? Here are some exciting variations to consider.
Herb-Infused Prime Rib
Try enhancing your reverse sear prime rib with a vibrant herb marinade. Fresh rosemary, thyme, and garlic bring a wonderful aromatic twist. Simply blend your favorite herbs with olive oil, salt, and pepper. Marinate your prime rib for a few hours (or overnight) before starting the reverse sear process.
Smoky Barbecue Twist
For those who crave a hint of smoke, a barbecue rub can elevate your dish. Combine smoked paprika, cayenne, and brown sugar with traditional spices. This sweet and spicy blend not only adds depth but will bring out a whole new flavor profile in your prime rib.
Asian-Inspired Glaze
Want something a bit more exotic? An Asian-inspired glaze made from soy sauce, ginger, and sesame oil can transform your reverse sear prime rib. Apply the glaze during the last hour of cooking for a mouthwatering finish that’s savory and slightly sweet.
Coffee Rub
A coffee rub may sound unusual, but it creates a rich, deep flavor that pairs beautifully with beef. Mix ground coffee with brown sugar, pepper, and salt. The coffee brings out the natural umami in the meat, making it a unique experience for your taste buds.
By experimenting with these variations, you can make your reverse sear prime rib uniquely yours, impressing dinner guests with every delicious bite.
Cooking Tips and Notes for Reverse Sear Prime Rib
Creating a perfect reverse sear prime rib is truly an art, and a touch of patience can elevate this dish from good to spectacular. Here are some thoughtful tips to help you along the way:
Choose the Right Cut
When selecting your prime rib, aim for a well-marbled cut. The marbling ensures tenderness and enhances flavor during cooking. A bone-in rib roast not only adds flavor but also looks impressive on the dinner table.
Allow for Proper Resting
After cooking, let your prime rib rest for at least 20-30 minutes before slicing. This step allows the juices to redistribute, resulting in a juicier, more flavorful roast. You can loosely cover it with foil to keep it warm without steaming the meat.
Monitor the Temperature
Investing in a quality meat thermometer is a game changer. For a perfect medium-rare finish, aim for an internal temperature of 130°F (54°C) before searing. Remember, the temperature will continue to rise as the meat rests!
Searing Technique
For that perfect crust, use a hot skillet or grill. Sear the meat for about 10-15 minutes until golden brown, flipping as needed. Don’t rush this step; it’s what gives your reverse sear prime rib that irresistible flavor.
By following these tips, you’ll be well-prepared to impress your friends and family with a stunning prime rib that will have everyone asking for seconds. Enjoy the process, and happy cooking!
Serving Suggestions for Reverse Sear Prime Rib
When it comes to celebrating special occasions, nothing beats the impressive presentation of reverse sear prime rib. This showstopping dish deserves equally fabulous accompaniments to complement its rich, succulent flavor. Imagine setting the table with a spread that invites your guests to indulge in the ultimate dining experience.
Classic Side Dishes
- Garlic Mashed Potatoes: Creamy and buttery, these are the ideal canvas for soaking up those flavorful juices from your prime rib. Consider using roasted garlic for a deeper flavor.
- Roasted Vegetables: Opt for seasonal veggies like carrots, Brussels sprouts, and asparagus. Toss them in olive oil, season, and roast until caramelized for a delightful contrast to the meat.
- Yorkshire Pudding: If you’re feeling adventurous, serve your reverse sear prime rib with Yorkshire pudding. This classic English side is perfect for mopping up gravy.
Elevating Your Feast
- Red Wine Reduction Sauce: A homemade red wine sauce can enhance the flavors of your prime rib. Simply reduce red wine with shallots and thyme until thickened, and drizzle it over each serving.
- Fresh Herb Garnish: Add a pop of color and freshness by garnishing with fresh herbs like rosemary or thyme.
Consider these suggestions as a way to elevate your reverse sear prime rib meal into a full-blown feast that’s perfect for any celebration or get-together!
Print
Standing Rib Roast
- Total Time: 30 hours
- Yield: 8 servings 1x
- Diet: Carnivore
Description
This recipe for a bone-in standing rib roast is mostly hands-off and requires some planning ahead, offering excellent flavor and texture when cooked properly.
Ingredients
Scale
- 1 (6-pound) bone-in standing rib roast (fat trimmed to about 1/2 inch)
- to taste kosher salt
- to taste freshly ground black pepper
- 4 tablespoons unsalted butter (softened)
- to taste fresh rosemary and/or thyme
Instructions
-
Before you begin (important timing notes): This recipe needs a little planning. Allow the roast to sit 24 hours ahead for the best flavor, with about 2 hours of resting at room temperature before cooking. The cooking time is 3–4 hours, depending on oven temperature and roast size.
-
Seasoning (ideally 24 hours ahead): Generously season the rib roast on all sides with kosher salt. Place it on a rack set over a baking sheet and refrigerate uncovered or loosely covered to allow the surface to dry and the salt to penetrate deeply.
-
Preparation before roasting: Remove the roast from the refrigerator around 2 hours before cooking to bring it to room temperature. If using the butter option, mix it with freshly ground black pepper and optional herbs. Slather evenly over the roast. If not using butter, simply season the roast generously with black pepper.
-
Prepare for roasting: Preheat the oven to 200°F–225°F. Place the roast fat side up on a roasting rack set in a large roasting pan, or on a wire rack inside a rimmed baking sheet. Insert a meat thermometer into the thickest center portion of the roast, avoiding the bone.
-
Low-temperature slow roast: Roast until the internal temperature reaches your preferred level: Rare: pull at 115–120°F, Medium-rare: pull at 120–125°F, Medium: pull at 130–135°F. The USDA recommended minimum is 145°F, followed by a 3-minute rest.
-
Resting (critical for juicy meat): Remove the roast from the oven and place it on the counter, tented with foil. Let it rest at room temperature for 30 to 60 minutes.
-
High-temperature searing: Increase the oven temperature to 450-500°F. If excessive fat has collected, transfer the roast to a clean pan to minimize smoking. Return the roast to the oven and sear for 5 to 10 minutes until a deep brown crust forms.
-
Final rest and serving: Remove the roast from the oven and let it rest for a few minutes. Carve into slices and serve immediately.
Notes
- Plan for about 30 hours from start to serving if you follow the full 24-hour dry-salting step.
- This is not a last-minute dish; it requires time for preparation and cooking.
- The final sear is quick, just a matter of minutes, but essential for forming a crust.
- Prep Time: 24 hours
- Cook Time: 4 hours
- Category: Main Course
- Method: Roasting
- Cuisine: American
Nutrition
- Serving Size: 1 slice
- Calories: 400
- Sugar: 0g
- Sodium: 1000mg
- Fat: 30g
- Saturated Fat: 12g
- Unsaturated Fat: 15g
- Trans Fat: 1g
- Carbohydrates: 0g
- Fiber: 0g
- Protein: 40g
- Cholesterol: 100mg